Long Exposure Technique from Master Photographer Kevin Holliday
Long Exposure Workflow
Long Exposure photographers have a different workflow than traditional landscape photographers. This workflow can appear demanding and perhaps even daunting to those who are just learning, but I am here to tell you it’s really not as difficult as you might think. With a few steps to remember, and the right equipment, you will be well on your way to producing beautiful, silky results in no time.
It is this very seamless approach as to why I have come to love the WCC holder so much. We are already battling increasing or fading light, so having a system that allows you to work quickly and smoothly is of the utmost importance, which all comes together in the process listed below.

The Scene
You have found that perfect scene of water and clouds, or of buildings and clouds, or grasses blowing in the wind (or whatever else it may be) and have determined that a long exposure capture will transform the scene into something more.
Composition
Compose your image by placing a rigid, fixed item against a moving background (or foreground) such as water or clouds. For this scene I originally liked the sign in the foreground, but ended up settling on a more simplistic composition with one of the breakwater posts along the edge of the horizontal structure.

A long exposure will create negative space in both water and sky, so you will need to adjust the composition to account for the negative space. When you’re happy with the composition, lock down the tripod.

Camera Set-up

Decide if the image needs a polarizer and then either adjust it or remove it.

Determine if the image needs a graduated ND filter to balance the luminosity of the sky with the terrain below and install and adjust it accordingly.
Set ISO to “base”. This will increase dynamic range and help extend exposure times.
To determine a base exposure, meter the image through the camera to account for the polarizer and graduated ND filter.
Set the aperture and focus. The aperture will determine your depth of field. Once set, you can only adjust your shutter speed to achieve the proper meter reading. We will call this setting your base shutter speed. You can make a test exposure at this setting and check critical focus, exposure, and determine if the grad and pola are providing the desired effects.

Choosing an ND
Next, determine what effect you want in the scene to determine the length of exposure.
Slightly misty waves are typically between 2 and 10 seconds.
Smooth water that retains some texture is approximately 30 seconds to 1 minute.
Smooth water than is rendered featureless will require over 1 minute and typically by two minutes the effect has been maximized.
Long drawn-out clouds need 1-2 minutes exposure for fast moving clouds (for example clouds near the sea). For slower moving clouds, typically a 4-6 minute exposure is required.
From the base shutter speed, calculate how many stops of ND filtration are required to achieve your desired exposure duration. Typically for long exposure, this is between 10 and 16 stops of ND. I recommend finding a long exposure calculator in your phone’s app store. This will really help.
For this example, I plugged in the base shutter speed of 1/250, told the app I was using a 16 stop filter and it returned a value of 4 minutes and 22 seconds.

Install the ND
Slide the ND filter into the rear slot of the Wine Country Camera filter holder system. This is where the WCC holder shines, as it is the only holder on the market that allows for an ND filter to be placed and removed from the holder without disrupting the graduated ND, the polarizer, the focus, or anything else.
Having all your filters in vaults means that are no longer touching the glass itself when pulling it out of your field pouch, as shown here where I am not even holding the vault by its tab and still not touching the glass… brilliant!
Lightproof the Camera
For added light leak protection I cover my entire camera and lens with a towel. Light will leak into your camera from a vast number of areas, including but not limited to, the viewfinder, the lens (especially for tilt/shift lenses), the USB ports, the battery door, etc. It’s best to just take the extra precaution to make certain your capture will not be plagued with the purple haze of light-leak. Please note: my camera in these pictures is shown uncovered only for the purposes of this blog.
The Capture
The hard part is over and now comes the one remaining detail, the capture…
If cloud movement is what you are after, wait until the cloud pattern is setting up in a pleasing manner before making the exposure.
If water is the only moving subject, you are typically good to go at any point
Place your shutter speed on “Bulb” or “Time” setting, then enter the desired amount of time into the camera or remote in accordance to the calculations we made earlier for exposure and filter factor. Note, you absolutely should be using a remote release for this type of work to reduce camera shake and improve image quality.
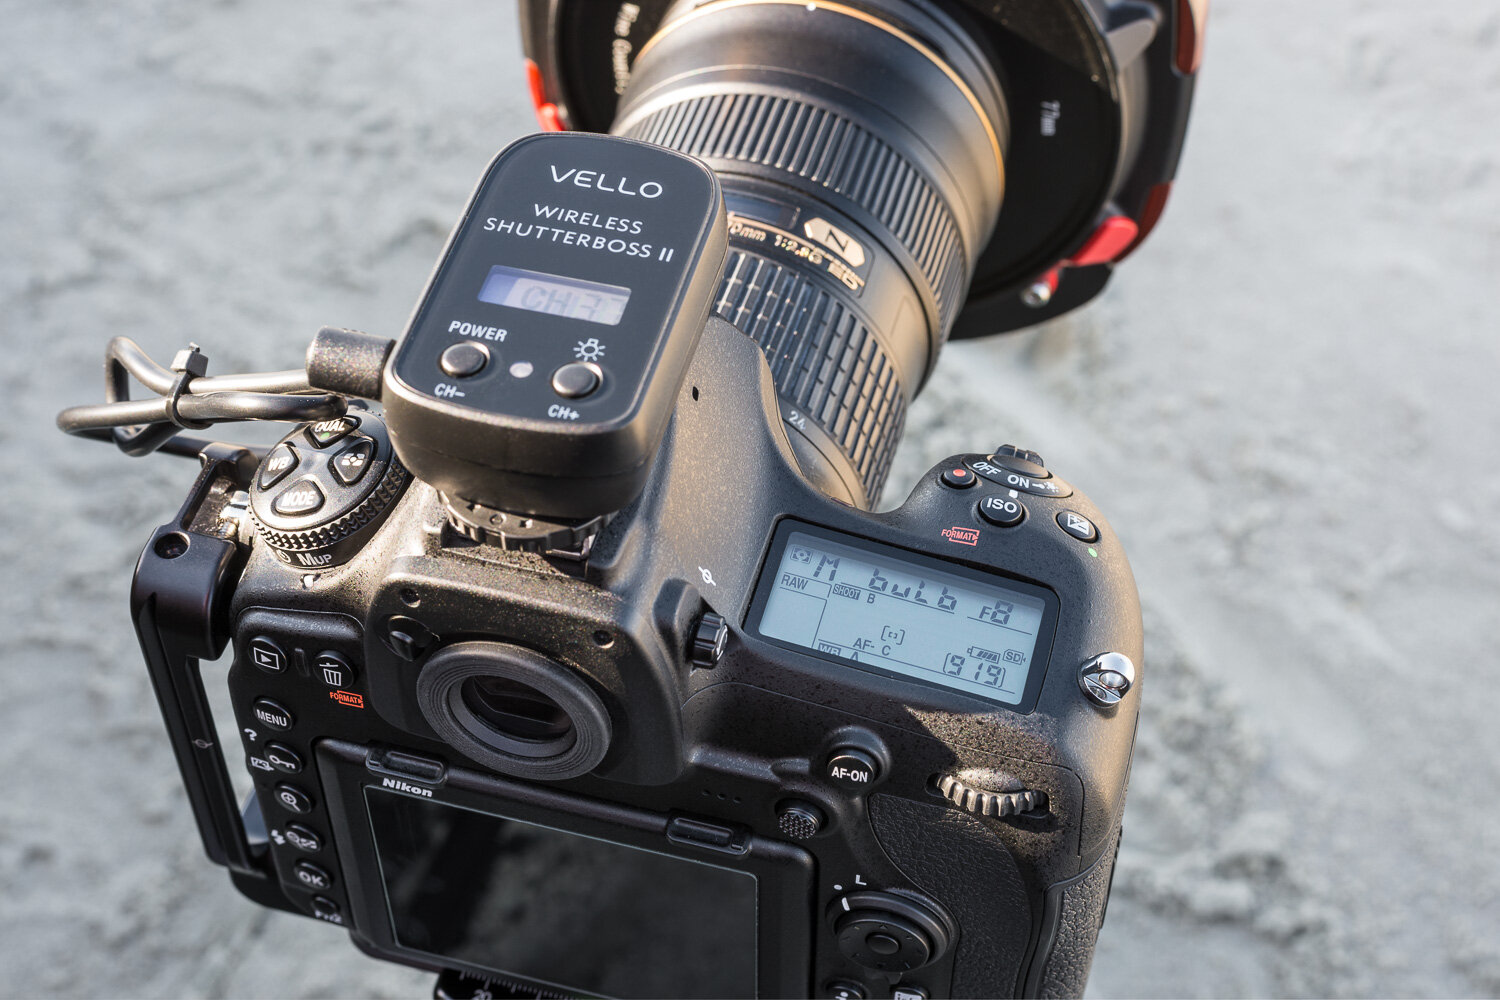
Now, make your exposure and then evaluate the results on the rear screen, checking for critical focus and proper exposure. I use a Hoodman Hoodloupe to block out the sunlight so that I can see every detail of the capture.

Make the necessary adjustments, then make another exposure until you’re 100% happy with the results. Congratulations, you have just made a successful long exposure capture using the Wine Country Camera filter holder!


So how has this all come together in such a way that I will now ONLY use the WCC holder, you might ask? Well, all of my work is based substantially around VISION. I bring this vision to life not only in post-production, but also when in the field I am already post processing the captures in my minds eye. Like many other artists, I rely a great deal on rhythm and flow when working in order to not have that vision become disrupted. There are certainly many things that can get in the way, but the one thing that no longer disrupts my flow is my equipment. The WCC holder becomes almost an afterthought because of how simple it is to use. I no longer need to fidget with clumsy filter holders or wipe fingerprints off of the filters themselves. I compose the shot, do the math, drop in the filter, and make the capture… SIMPLE AS THAT!
See more of Kevin’s work at https://www.kevinhollidayphoto.com